
(Note: this is not an experiment—because you can eat the results. This is a cooking project that shows how science is part of our everyday lives!)
Ice cream is a great summertime treat. You probably buy ice cream from the supermarket, but ice cream is pretty easy to make at home. You don’t need a fancy machine, either. You can make your own ice cream with some simple household items. And, at the same time, you can explore some science!
The recipe for vanilla ice cream is simple—half and half, sugar and vanilla are mixed together to make the ice cream base. But changing these three things into a tasty dessert requires a little scientific know-how. You can’t just put the base into the freezer and get ice cream. The liquid will freeze and become a solid but it won’t have the familiar texture of ice cream. The water in the cream will freeze more quickly than the rest of the half and half and you will get an icy mess!
To get everything to freeze together with the familiar, delicious texture of ice cream, you must make sure that the base is mixed continuously while it is freezing, so that the fat and liquid particles stay together. You also want to be sure that the mixture freezes quickly. The faster the mixture freezes, the smaller the ice crystals. Small ice crystals make the ice cream taste smooth and creamy!
Materials
- 1/2 cup half and half (or 1/4 cup heavy cream and 1/4 cup milk)
- 1 tablespoon sugar
- 1/2 teaspoon vanilla
- 2 quart size zipper top plastic bags
- 1 gallon size zipper top freezer bag
- 4-5 cups of ice
- 1/4 cup coarse (Kosher) salt
- Thick gloves or a thick towel (to use while handling the ice)
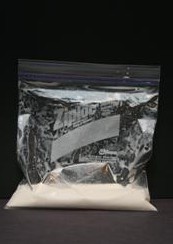 1) Place the half and half, sugar and vanilla in one of the quart size zipper top bags. Shake gently until the sugar dissolves.
2) Carefully squeeze as much air from the bag as possible. Seal the zipper top. This step is important because excess air in the bag can make force open the zipper top and the cream mixture will spill out.
3) Place the bag with the cream mixture into the second, quart size bag. Remove the air from the second bag and seal it. The second bag will help keep the ice/salt away from the cream mixture, keeping the ice cream tasty!
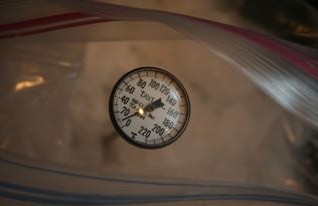 4) Place the ice into the gallon size zipper top bag and add the coarse salt. Put the bags containing the cream mixture on top of the ice/salt in the bag. You can use a thermometer to verify that the temperature of the ice/salt mixture is below the normal freezing point of water (32oF). Remove as much excess air as possible from the gallon size bag and seal it.
The bag will get very cold—use thick gloves or wrap the bag in a thick towel before you handle it!
5) Make the ice cream. Shake or roll the bag so the ice and ice cream base are constantly moving. In approximately 10 minutes, you will have ice cream! Carefully remove the quart size bags from the ice. Be sure to keep the salt/ice mixture away from the ice cream!
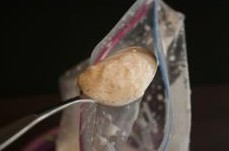 The ice cream may be soft. You can eat it now (if you like soft ice cream) or you can put the quart size bag into the freezer until the mixture hardens completely.
Why does this work?
The added salt lowers the freezing point of water. The ice/salt mixture can get colder than 0oF and freezes the ice cream mixture quickly. The quicker the freezing, the smaller the ice crystals formed in the ice cream. Small ice crystals are important because, when the crystals are large, they ruin the smooth texture that we all like in our ice cream.
Shaking the ice cream mixtures also helps keep the ice crystals small and also helps keep all the components of the milk/cream mixture together.